Hi all,
Here is a fun card to make with the Spooktacular Bash Stamp Set. It was inspired by Mary Fish, but changed to a stand up card. I hope you like it. I've added directions below!
Spooktacular Bash Card:
Ingredients:
Stamps: Spooktacular Bash Bundle
– Ink: Memento Black – CS: Monster Bash DSP, Pumpkin Pie, Basic Black, Whisper
White scraps, Black Foil – Extras: Stylish Scroll embossing folder pg 53 HC,
Every Season Punch Pack pg. 50 HC, Blends: Pumpkin Pie, Crumb Cake, Poppy
Parade, light Smokey Slate, black pg. 179 in AC, Stitched Shapes pg. 196 AC
Dimensions:
Pumpkin
Pie Cardstock:
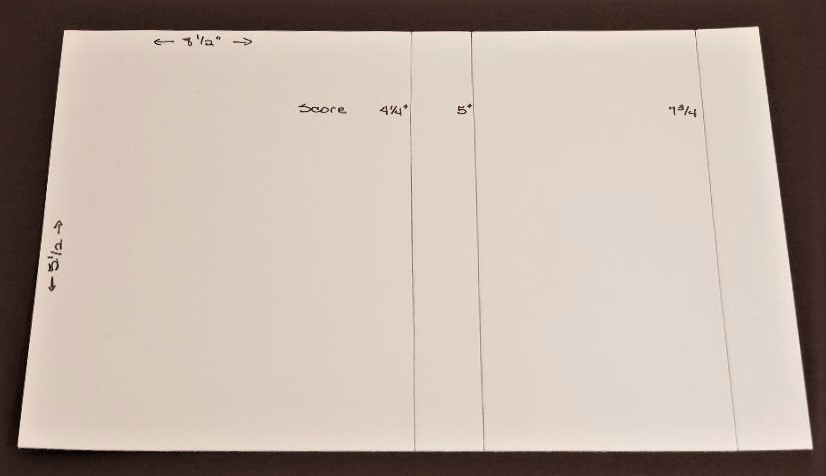
Base:
4 ¼” x 11”, scored at 5 ½” and 2 ¾”
One
piece at 3 ½” x 4 ¾”
One
piece cut out with largest rectangle in Stitched Shapes die set.
Designer Paper: 4” x 5 ¼”
Basic
Black: One piece 3 ¼” x 4 ½”
Layer the designer paper to the front of the
folded Pumpkin Pie cardstock base. This
layer will cover the 2 ¾” scored line.
Fold the card at the scored line so that the designer paper will
crease.
Emboss the Basic Black cardstock piece
using the Stylish Scroll Embossing folder and layer onto the larger 3 ½” x 4 ¾”
Pumpkin Pie cardstock using adhesive.
Die cut one large and one small decorative
frame from the Spooktacular Bash bundle with Basic Black cardstock. Stamp Dracula onto a scrap piece of Whisper
White cardstock with Memento Black ink.
Color face with Crumb Cake blend, background with Smokey Slate blend, shirt
with Poppy Parade blend and edging with Pumpkin Pie blend. Die cut and go
around the die cut edges with Black blend to hide the white edges. Add to the small decorative rectangle frame
using adhesive. Add to the front of the
Pumpkin Pie stitched rectangle using dimensionals. Add to the upper area of the Black embossed
cardstock using dimensionals.
Stamp Creepy to a scrap piece of Whisper
White cardstock and die cut. Add to the
base of the front of the Black embossed cardstock using dimensionals. Add dimensionals to the lower portion of the
Pumpkin Pie cardstock and add to the front of the card. The card will fold up, lifting the top part
that was not secured with dimensionals.
Stamp “So Glad we’re such ghoul friends” on
scrap Whisper White cardstock using Memento Black ink and die cut. Edge with
Pumpkin Pie blend. Layer onto the large decorative black frame using adhesive. Add to the base of the card using
dimensionals. This will keep the card
standing up.
Punch out two small bats and add one to the
inside and one to the front of the card using dimensionals.
Have fun with this cute card! Click on Shop Now to order your Spooktacular Bash bundle today!